
On the drawing board: Testing out 10 Stars
Most new homes in Australia rate little more than 6 Stars for energy efficiency, the mandatory minimum. What does it look like to aim for the top of the scale, and can it be done without costing an arm and a leg? Builder Craig Riddle set out to design and build a very high-performing house using iterative energy rating assessments, careful construction and standard, readily available materials. He shares what he learned along the way.
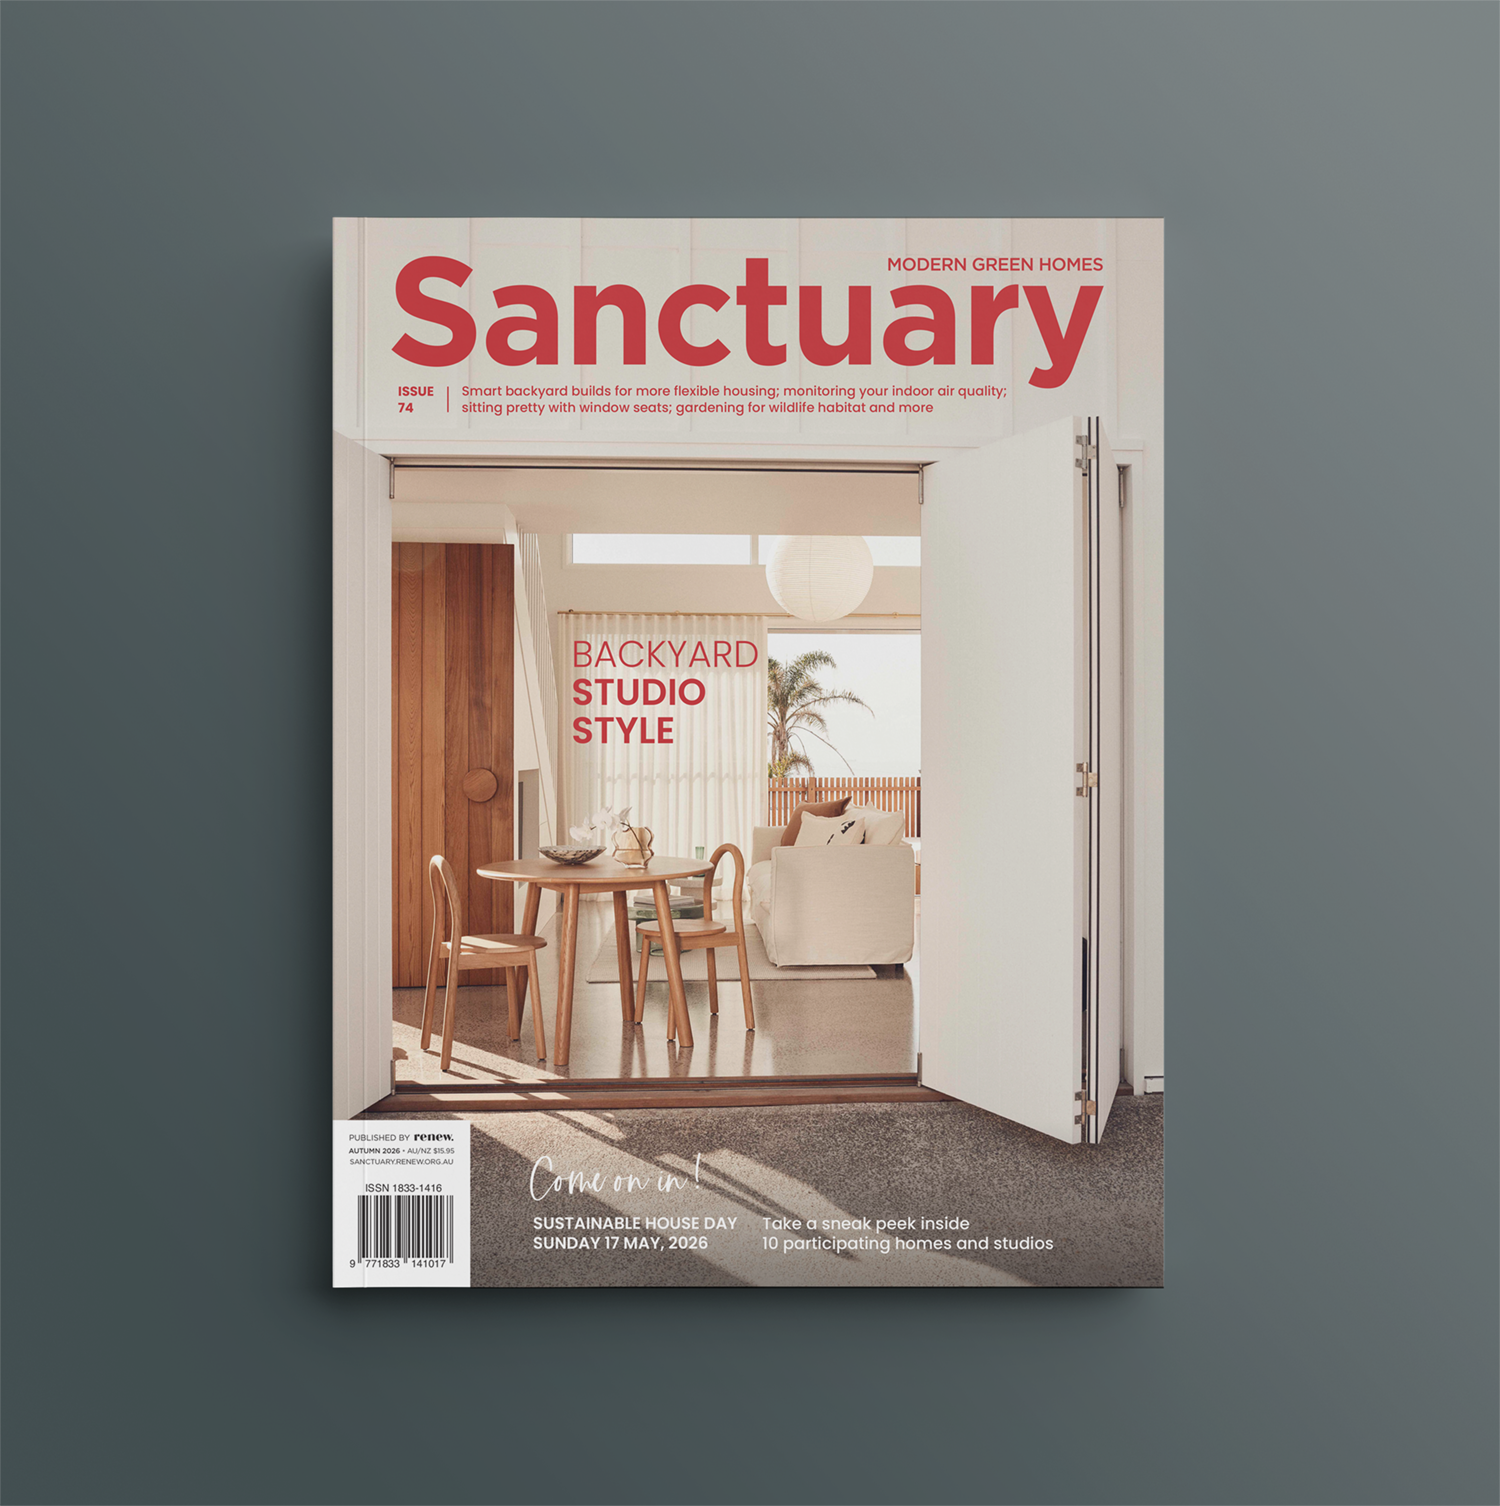
I had been considering building a secondary dwelling on my investment property in Telarah, inland from Newcastle, for a little while. Being a builder, I felt this was a great opportunity to really push the boundaries and explore the possibilities around thermal performance without the constraints we’d normally have working directly with clients.
What was important to me was achieving a high-performing house with readily available materials and cost-effective construction methods. From early on I had a goal in mind of designing the project to be 10 Stars, the highest possible NatHERS rating. The main reason behind this decision was for me to learn and understand first-hand how it could be done. I also wanted to see if it was possible to demonstrate that a 10-Star house is within reach for people who are passionate about sustainability but don’t have a huge budget.
I have explored and used passive solar design principles for many years in my business, but this time I wanted to go further to really understand the possible benefits for the occupant when weighing up construction costs and thermal comfort. The ultimate questions were: Is aiming for 10 Stars realistic? Is it worth the return on investment?
Design process
It was obvious to me that to achieve my goal of 10 Stars it would be best to start engaging with our energy assessor as early as possible in the process. Rather than just designing something and having it assessed, we worked collaboratively right from the initial sketch to achieve the desired outcome. For this experiment to work, I decided it was also important that all products and construction systems be able to be modelled with the NatHERS software – no assumptions or proxies could be made. In any case, this fitted in well with my intention to use standard materials and systems.
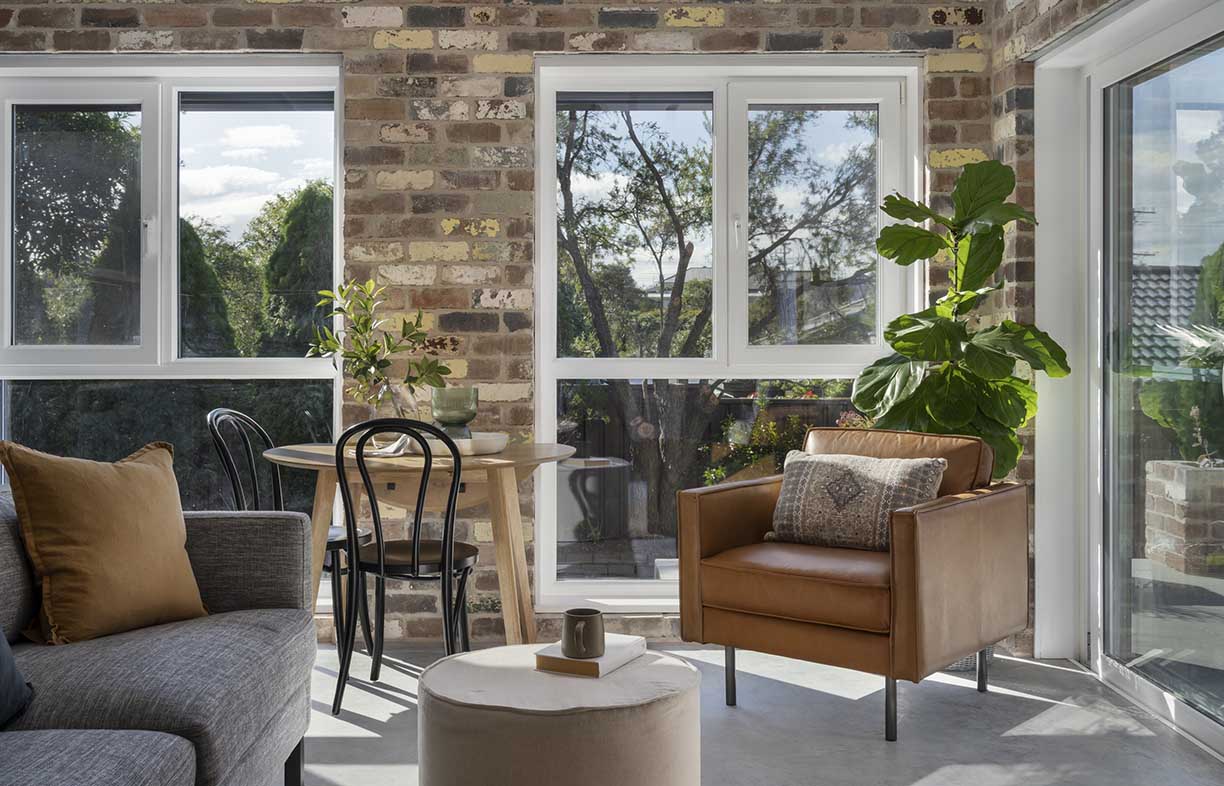
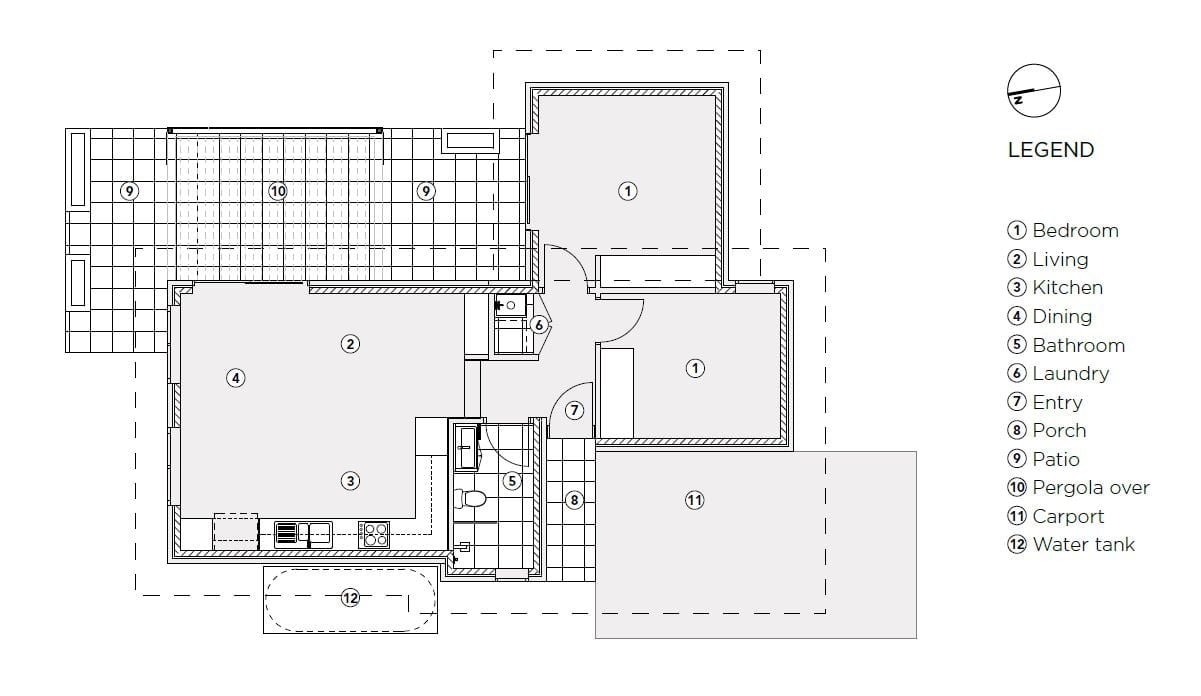
Of course, designing to suit the site was a must: in this case, the western part of a slightly sloped 856-square-metre corner block that already had a single storey house on it. The design needed to be true to passive solar principles, with solar access to northern glazing, adequate shading, cross ventilation and connection with the outdoor living space. I also wanted to be sympathetic to the site by minimising the cut and fill and being mindful of maintaining the natural water flow paths.
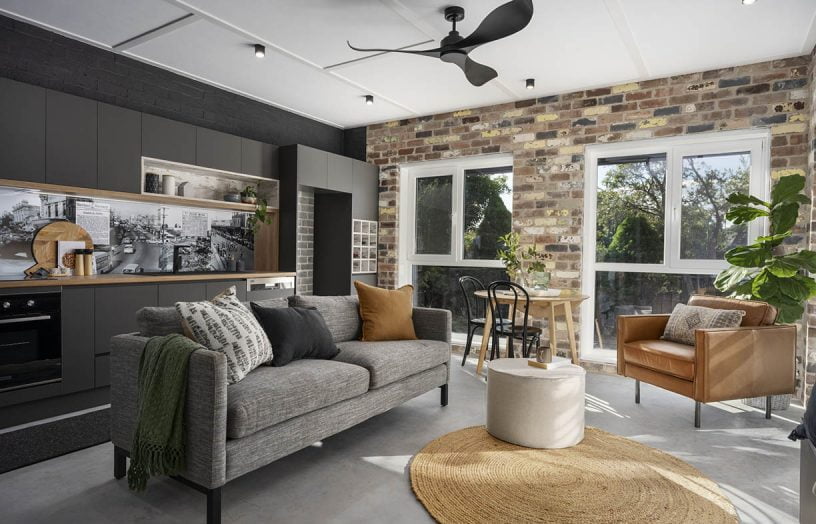
As the house was a secondary dwelling, it was limited to 60 square metres, so I opted for a two-bedroom design with an open plan living space. Given the orientation of the site, it made sense to put the living areas at the rear, facing north. I also wanted to have a good connection with a multi-purpose outdoor space, so this location of the living areas worked well. The bedrooms were located on the south side of the building towards the street, with the carport on the south-western corner.
But incorporating the passive solar design basics wouldn’t be enough on its own to achieve the 10-Star goal. What was key with this project was the role the energy assessor played from very early on. The initial design concepts were repeatedly modelled in the NatHERS software so that we could be sure we were on the right track. Through this process we quickly achieved a 9.2-Star rating.
This was the point where the real learning curve began, as we pushed towards 10 Stars. With every small change to the layout, we had to monitor whether the heating and cooling loads were affected (the predicted energy needed for heating and cooling, a key part of the energy rating). One small tweak might improve the cooling load but have a negative effect on the heating load, meaning no improvement in the overall Star rating. It was a real balancing act, and it was fascinating to understand better what the software did and didn’t value.
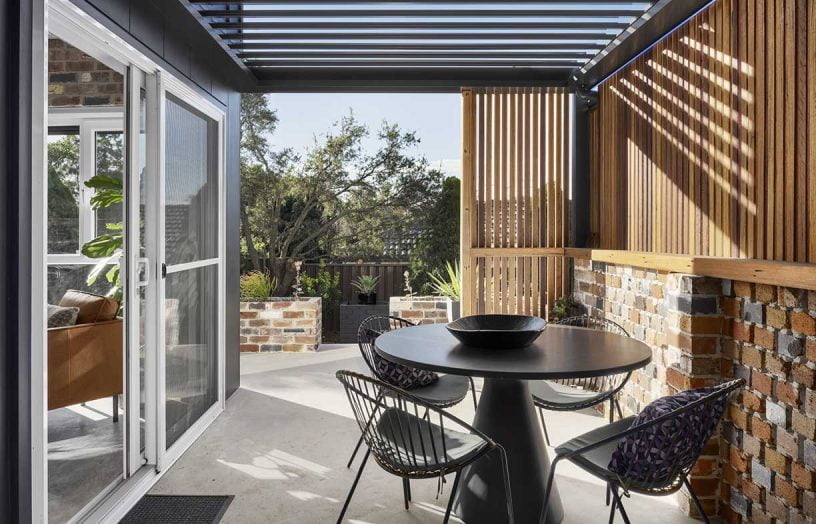
During this process we ended up changing the aspect ratio of the living space, making it wider in the east-west direction so that the northerly aspect was increased. We trialled different window sizes, particularly in the living space, but ultimately reduced them as the larger windows worked terrifically in winter but terribly in summer. We also modelled different eave sizes and found that 600-millimetre eaves were required to the north and west while 450 millimetres to the south and east worked fine. Adjustable shading was also needed over some of the west-facing glass, and we decided on an operable louvre roof to make the outdoor space an all-weather area, adding 27 square metres of extra living space to the modest house.
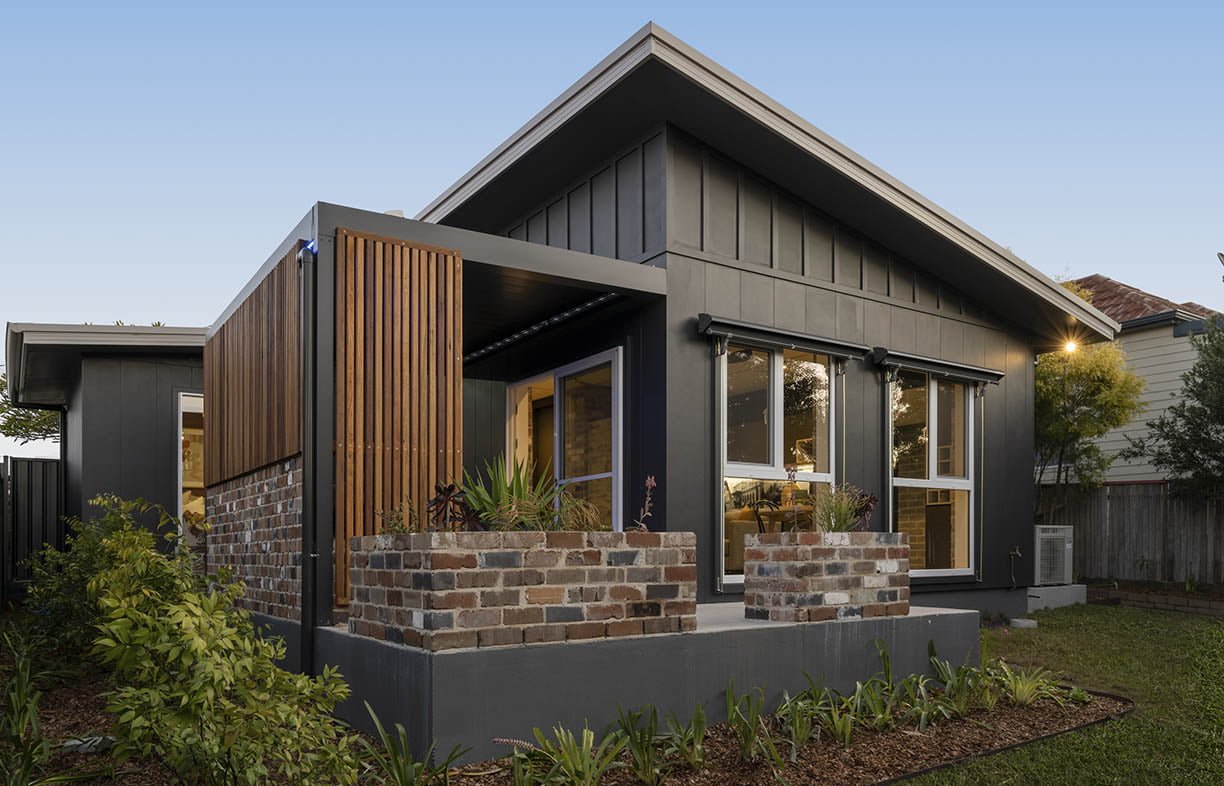
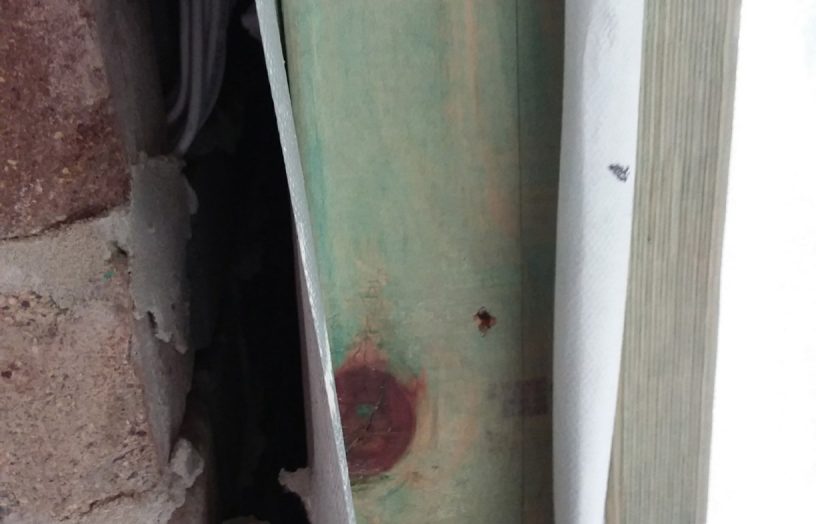
It was really a case of trial and error, and it wasn’t one thing in particular that got us to the elusive 10-Star mark; it was maybe 20 or more little things combined. That said, one crucial element to finally obtaining the 10-Star rating was the external wall system. Our choice of reverse brick veneer got us a long way, but it wasn’t enough on its own. It made a big difference when we added not one but two air cavities using reflective, vapour-permeable membranes: one between the bricks and the insulation and one between the insulation and cladding.
After finally achieving my goal for the design, I weighed up the costs to push forward with the build. I was pretty invested in the process by this stage and eager to see it through, but it had to be a sound financial investment too. While some of the labour costs were still unknown given that it was something of an unusual project, we felt confident that it could be achieved for a reasonable price and so the decision to go ahead and build was a relatively easy one.

Materials
Material selection was just as important as the design. We didn’t just want to produce a high performing home, but a sustainable one too.
Wherever possible we aimed for natural materials, locally sourced recycled materials, and those that were renewable, recyclable and zero- or low-VOC. We also opted for materials that were low maintenance and long-lasting. True sustainability to me is a building that will stand the test of time with minimal maintenance, so this was particularly important. The other key thing was that the materials we selected needed to be easily installed by standard tradespeople, with no speciality trades or skills required.
Taking all this into account, five main materials make up the bulk of the building: recycled clay bricks, Scyon fibre cement cladding, recycled timber, Green Star concrete for the slab and Colorbond roofing.
The extensive use of brickwork throughout was important to achieving the thermal mass required for the 10-Star rating. In fact, during the modelling phase, we originally trialled the house with reverse brick veneer external walls combined with standard timber-framed plasterboard internal walls. This wasn’t quite enough, so the internal walls were all changed to single brick. Of course, new bricks are quite high in embodied energy so specifying recycled bricks was crucial to obtaining the Star rating while minimising the carbon footprint of the building. The other benefit of recycled clay bricks is that they are denser than more modern extruded bricks and therefore should perform substantially better as thermal mass. Interestingly, this isn’t factored into the NatHERS software; the type of brick has no bearing on the Star rating.
A solar PV system complete with battery storage was also installed. This comprised a Redback hybrid inverter, 4.8 kilowatt-hours of battery storage and a total of 7.8 kilowatts of PV panels. While not a requirement to achieve the 10-Star goal (systems like solar PV, hot water and active heating and cooling are not taken into account by the NatHERS software), it not only ticks the sustainability box but also provides the possibility of receiving a credit for energy at the end of the quarter as opposed to a bill.
The build
Now came the fun bit. I love building and creating, so I relished being back on the tools and heavily involved in seeing this project come to life. Throughout the construction process, I continued to work closely with the energy assessor, sending photos and asking questions. For example, I wanted to understand how the software treated thermal bridging and air gaps so that we could make sure that any junctions and internal and external corners connected correctly within the external wall system, in line with the 10-Star rated design.
These check-ins were incredibly important to ensure that the construction details carried out on site truly matched the plans. It is one thing to have the certificate, it’s another to actually build the house the way it was designed.
The finishing touches to the house included some raised vegetable garden beds built from the leftover recycled bricks, a 5000-litre water tank, and a fence for privacy from the existing house on the block. We also offset the estimated carbon emissions created throughout the build, as we do with all of our projects.
The result
The house was finished in autumn 2020 and our first tenant is about to move in. The total cost of the build including the fencing, landscaping and driveway was $315,000 (including our standard builder’s margin), or about $2,850 per square metre of gross floor area (including patio and carport). This compares pretty well with our standard sustainable builds, which generally cost around $2,500 to $2,700 per square metre.
For me the project doesn’t end there though; it’s from here on that I think I will learn the most from this journey. We’ll be monitoring the energy consumption and solar generation. We have also installed data loggers to monitor differences in the internal and external air temperature and we’re pleased with the early results, which show a 7 or 8 degree difference on these cooler winter mornings, without active heating.
It could be a couple of years before we get enough data to completely understand the benefits of going down the 10-Star path. For now, what I have learned is that it is a realistic goal, and it is achievable with standard building materials that can be bought at your local building supplies store. And for under $3,000 per square metre, this kind of house should be attainable for a lot of people.
For me, this was a satisfying exercise in learning and pushing the boundaries. I hope sharing my story will excite other builders and homeowners and challenge them to head down the path of sustainability.
 Ideas & Advice
Designers in profile
Sanctuary talks to two skilled home designers on their experiences and what shaped their design philosophies.
Read more Ideas & Advice
A breath of fresh air
Monitoring air quality could transform how you live in your home. Rachel Rose explains why and how.
Read more House profiles
Sustainable House Day 2026: Come on in
Once a year, hundreds of people across Australia open their doors and share what they’ve learned about making their homes more comfortable, affordable and climate-ready.
Read more