Simple and cheap composting loo

A composting loo lets you save huge amounts of water each year from toilet flushing, and can extend the life of an old septic by removing most of the solid waste load. Spud Murphy describes a popular design used for decades.
Like many rural dwellers, our septic system has seen better days, and needed a break. We decided on moving to a composting loo, for a while at least, as a trial. I started looking around and found the commercial units, while nicely designed, were expensive.
Our house is sitting on foundations, at least where the wet areas are, so a split system wasn’t viable and we needed a self-contained unit. These are basically a pedestal with a removable container inside. You do your business and add in a cup of dry covering material — wood shavings, sugar cane mulch or similar materials are commonly used. When the container is full, you put on the lid, remove it and put it in a warm spot to compost.
Now, this works well, with minimal smell because of the dry covering material, but it means that you need multiple containers, and for the commercial units, these containers run to close to $200 each, for what is effectively a specially shaped plastic bucket!
A cheaper, better way
There have been quite a few alternative designs published over the years, and the two I think are the simplest are the wheelie bin loo and the bucket loo. (For more on DIY composting loos and humanure in general, check out the Humanure Handbook and the Composting Toilet Handbook at humanurehandbook.com).
The wheelie bin loo is a great idea, but because the bins are high you need either a split level system, with the bin under the house, or you use a smaller wheelie bin and have a step up to the pedestal. There is a great example of the latter on the Good Life Permaculture website at goodlifepermaculture.com.au/wheelie-bin-compost-toilet but I wanted to avoid steps, as we are both getting older, so the fewer fall hazards, the better.
The end solution was the unit you can see here. It uses standard 20 litre plastic buckets that come complete with lid and cost under $15 each from the local hardware store. I expect we will need up to a dozen of these in rotation, which will cost around as much as just one of the purpose-made units for commercial composting loos.
Building the loo was simple. I had a leftover sheet of 27mm thick acacia benchtop material that was bought for another project that hadn’t happened after several years, so I used it for this instead. I simply cut the required pieces for the sides, front and top (see Table 1 — a circular saw is really handy for this, I can’t speak more highly of our DeWalt cordless unit, it’s a little beast) and assembled them to form a box measuring 547mm long, 450mm wide and 415mm high. The back used a spare piece of ply, as there wasn’t enough of the acacia sheet for that—but it goes up against the wall and can’t be seen, so it doesn’t matter.
Table 1. Required dimensions for the panels used to make the loo. Note that the length of the top piece will depend on the board thickness, as the front piece mounts on the front edges of each side.| Panel (27mm thick) | Length | Height or width |
|---|---|---|
| Sides (two required) | 520mm | 415mm |
| Front | 450mm | 415mm |
| Top | 547mm | 450mm |
| Back | 396mm | 415mm |
| Bucket | 300mm diameter | 410mm high |
The pieces were screwed together using corner blocks for the front—this allowed me to eliminate visible screws on the outside of the base. The back panel was held in place with four galvanised steel angle brackets I had spare.
The top obviously needed a hole the right size, so I simply placed the toilet seat at the right position and marked out the inner shape of the seat onto the wood, then cut it out with a jigsaw. The lid set I used has quick-release hinges; you fit the hinge mounts and the hinge pins simply click into the seat hinge—you can release the seat with the press of a button.
The design my loo is based on is called the Lovable Loo, and in that design, the bucket protrudes through the top of the lid and fits right up under the toilet seat—I may yet modify our loo to that design.
The lid is hinged along the left-hand side using a pair of stainless steel hinges (recycled from another decommissioned project), as you can’t hinge it from the rear if the loo is to sit up against the wall. You can split the lid into two, with a strip across the back to fit the hinges onto, but in our situation, the left-hand hinge worked out more suitable.
Anyway, with a quick sand of the finished loo box with 240 grit paper and three coats of Cabot’s Stain and Varnish in walnut colour (because that’s what I found in the garage), the loo was ready to be assembled, which just involves screwing the lid hinges back into place (I previously test fitted them) and clicking the lid onto them.
I wanted to leave the flush toilet in place, and because the loo is in a separate tiny room at our place, the new composting loo was placed in the laundry, which is at the back of the house and affords plenty of privacy. It also has an outside door, so carrying the full loo buckets is a very short trip without going through the rest of the house.

What about wee?
That’s a good question. You can wee into the bucket as well, but it makes it heavier when time to change over, and can make the pile smell, so we mostly wee in the flush toilet (or on the garden if we get caught short outside and can’t be bothered going inside — one of the nice advantages of living rural with no immediate neighbours!)
If I replace the flush toilet with the compost unit permanently, I will fit a urine diverter and run the urine hose into the septic. Urine diverters can be either purpose-made units, which are readily available on ebay and similar sites for around $130, but I’ve seen commercial diversion composting toilets using something as simple as a plastic funnel attached to a flexible hose, so urine diversion can be extremely cheap if you wish.
The composting process and health safety
There has been a lot written on composting loos, and how to use them, and there are a couple of composting methods.
The first is to use multiple buckets and just let the waste compost in the bucket. This can take six months or more, so you can end up with quite a few buckets, so you need to have a system where the new buckets go in at one and of the chain and the composted buckets are taken from the other end, emptied and reused.
The other, preferred, method is to transfer the waste into a larger composting unit. I’ve seen some quite nice, elaborate setups constructed, with large composting areas, but the most readily available system is a pair of 220 litre or 400 litre Tumbleweed or similar compost bins. You fill up one bin while the other composts, and rotate between the two. For larger households, you have more bins. Examples of this can be seen on the humanure website. The main issue with this transfer method is that you have to tip the waste out of the bucket and then cover the pile. If you use an open pile rather than compost bins, the pile needs to be covered in straw or a similar material each time you add to it, and you must also exclude critters that may disturb the pile. The large closed compost bins seem to be the better option.
At the end of the composting, you end up with a small amount of high-grade compost which will be free of pathogens due to the temperature of the composting process. In colder climates, you are best to locate your buckets or bins in a warm, sheltered spot to aid the composting process. You can use the compost on your garden under mulch—there are many online resources that explain the requirements for reuse.
The other question many people have is, are these systems legal? The answer is, technically, probably not, but similar commercial systems, with similar bucket sizes, are approved in all states, so there is really no issue with using such a system if you use common sense and operate them the same way as a commercial unit of similar capacity.
Cost
The cost for our unit can be seen in Table 2 — as can be seen, it’s vastly cheaper than even the cheapest commercially available composting loo. Other costs not listed are a bucket/bin for the dry covering material, and a suitable scoop. We reused an old ash bucket from our decommissioned solid fuel heater, and a spare coffee mug as the scoop.
| Item | Cost |
|---|---|
| Sheet of benchtop or thick ply | $99 |
| 20L buckets with lid | $14.98 each, $179.76 for a dozen |
| 250mL Cabot’s Stain and Varnish | $25.50 |
| Assorted screws, brackets etc | $10 |
| EsTILO soft close toilet seat | $22.98 |
| Urine diverter (optional, ebay) | $130 |
| Total | $337.24 ($467.24 with urine diverter) |
Further reading
 ReNew
ReNew
Building a bigger backup
If you have critical systems that need to stay powered in a blackout, you need some sort of battery backup. Lance Turner describes his DIY system for supplying water without mains electricity.
Read more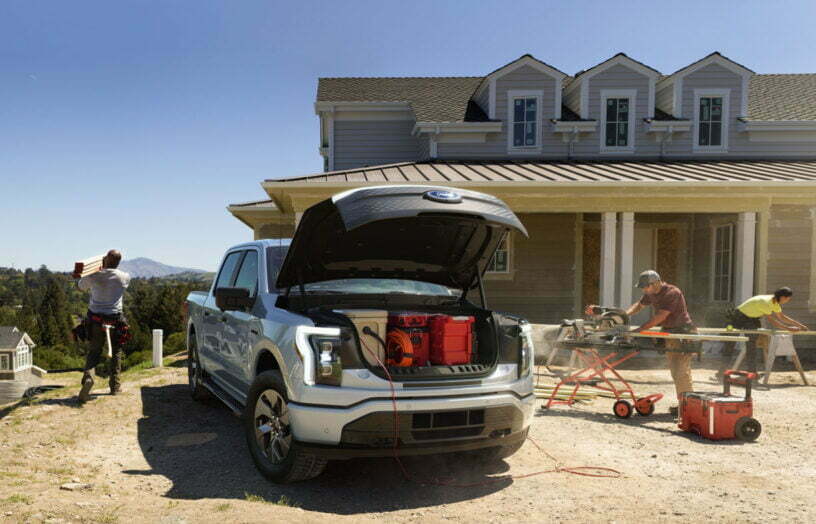 DIY
DIY
Bring on the electric ute
Bryce Gaton asks, will 2023 be the Australian ‘Year of the electric light commercial vehicle’?
Read more