Straight up: Vertical garden lessons
The last thing you want is to spend a lot of money on a vertical garden system and then have it fail. Jenny and Bevan Bates provide advice and inspiration from their own living walls—five years old and growing strong!
This article was first published in Issue 138 (Jan-Mar 2017) of Renew magazine.
The inspiration to garden vertically is not new. The Hanging Gardens of Babylon, if they are more than legend, may have been an early precursor, built to bring luscious greenery to the ancient city’s terraced buildings. Your grandma’s hanging pots are a more down-to-earth example, as are vines on a trellis.
More recently, the idea of living walls has become a popular trend, in part in response to higher density living and homes with small gardens. For Jenny and Bevan Bates, their move to a new house with a small courtyard— and a stark black brick wall facing their living area windows—was the reason they started experimenting with gardening on a wall.“You have to be prepared to experiment,” says Jenny. In fact, their first vertical garden was a failure. “We tried a $100 system, but the pots were too small and it dried out too quickly; it was hard to keep anything alive in it,” she says.
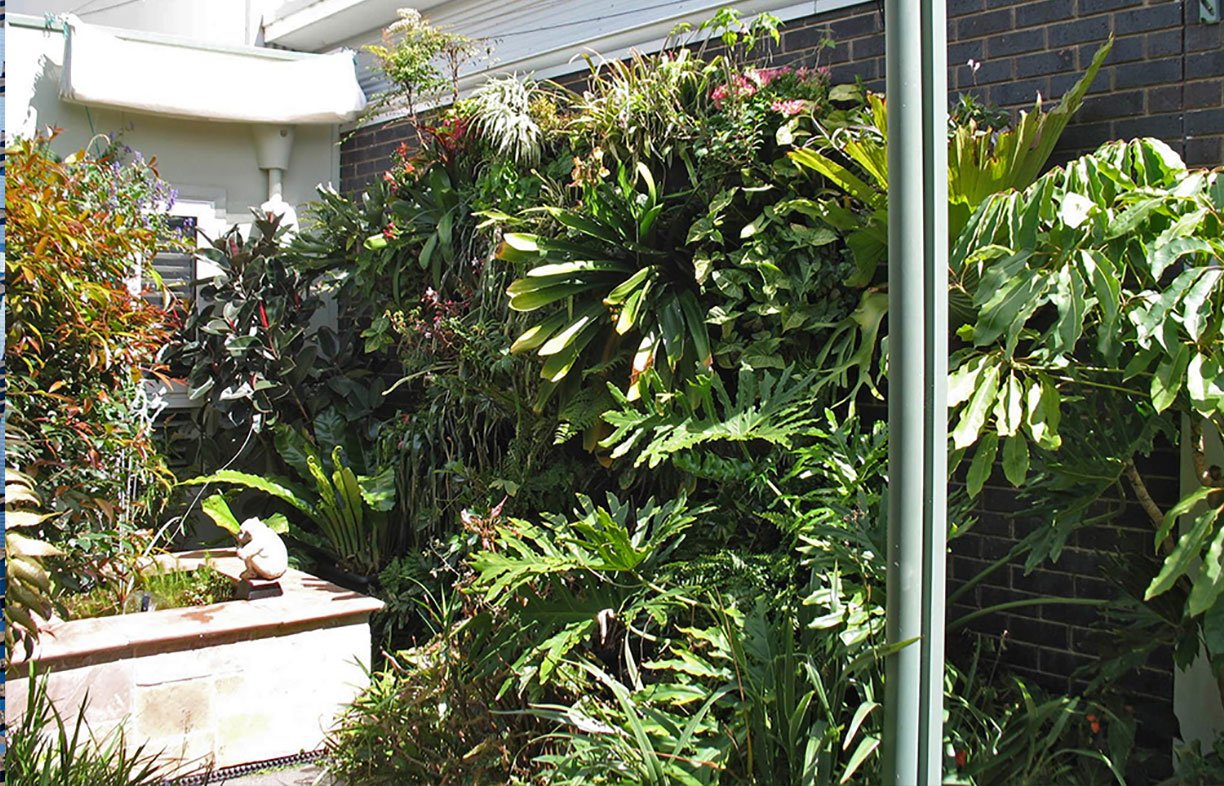
However, they persevered and they now have five vertical gardens providing cooling, colour and herbs, which adds interest to their home. The black brick wall in fact sets off one of the vertical gardens nicely—the colour they didn’t like turned out to be complementary to the planting!
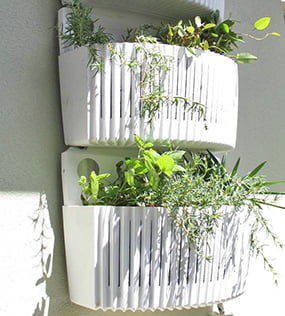
That particular garden was their first success, says Jenny. It’s now five years old and thriving (see photo above). It’s on a south-facing wall overlooked by the north-facing living area windows—a lovely sight.
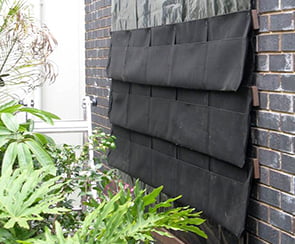
They created the garden using Woolly Pockets, a product which at the time they needed to get delivered from the USA (though there are now retailers in Australia).
The pockets are composed of long troughs of recycled polyethylene (PET, from milk bottles for example). That recycled aspect was important to them: “You need to think about the full life cycle; for systems made from virgin plastic, there can be a lot to dispose of at end of life,” says Jenny.
Which plants they use has evolved over time; some plants grew bigger than expected, shaded other plants or didn’t like the position.
Seeds of success
Jenny and Bevan note that the critical things to consider for success are: aspect, dictating how much sun the plants will get and when; a good growing medium; containers of sufficient size so they don’t dry out too quickly; an automated watering system as hand watering can be tricky with so many pots; and appropriate plant selection.
Jenny suggests that using a west-facing wall with its harsh sun will be difficult—a vine grown in the ground rather than many small pots would likely work better. But on other walls, the array of plants can add more interest and diversity than a single vine.
Their south-facing vertical garden looks lush, but there have been challenges along the way. The plants at the top get a lot of sun in the morning and afternoon during summer, so they need to be hardy. They lost several plants in the top row in the first year, so they now shade it in summer with an overhead blind made of white shadecloth.
The vertical garden on their north-facing fence is also a success, but needed to overcome challenges too. It gets full sun in summer, but very little in winter, so they’ve had to be careful in their plant selection. They’ve planted parts of it seasonally, with annuals that will grow for just the summer season and then a second set for the winter season. Abutilons, nandina, kalanchoe, sedums and a small correa have coped better here.
Watering required
An automatic watering system supplies water to each growing pocket and is programmed to water for three minutes a day in summer, less in winter. They also periodically water manually in summer to ensure the plants get a good soaking (dry potting mix can become hydrophobic), and flush the pots at least once a year to avoid a build up of salts.
Jenny notes that they even need to water in winter as one of their vertical gardens is under the house eaves, and the bottom pockets of all of the gardens tend to miss out if relying just on rainfall; though the northern-facing eaves do provide useful shade in mid-summer.
The growing medium should be a quality potting mix (not soil as it’s heavy and doesn’t drain well in pots) with sufficient nutrients for the types of plants grown. Jenny adds a handful of water crystals when first planting as “extra insurance”, providing additional water-holding capacity for up to six months: “I just throw a bit in, it’s not a science; I have occasionally used too many and then they ooze out the side!” She also fertilises at planting and as required with slow-release pellets.
Weighty matters
Supporting the structure needs thought. “There’s a fair bit of weight involved, with the container, growing medium, plants and water. You also need to factor in that the plants will grow!” says Jenny. That growth can exert a force out from the wall, as well as the weight pulling down on the wall. Some people use perlite and vermiculite to reduce the weight of the potting medium even further.
They had a couple of early failures with fixing the pockets to the brick wall. It’s a neighbour’s wall, so they used a product called Brick Grip, which clips onto the brick without any drilling required. It “sort of worked” but then several pockets started to fall. In the end, they used epoxy resin to attach the brackets as well as a couple of Dynabolts in key spots. A couple of the Living Wall Planters drilled into their own eastern wall came off too (these are a newer product from Woolly Pockets, with more rigid individual planting containers): the plastic wall plug holding the screw into the brick wall broke apart. They replaced them with fatter wall plugs and screws, and that’s all working fine so far.
Another must is to include a plastic sheet behind the garden to keep moisture off the wall. You’ll also want to consider height—so you can reach herbs or vegies—and space in front to enable access by a ladder for maintenance (such as deadheading, replanting, pruning, replenishing potting mix and fertilising). Some systems have pots that can be removed, but that can be tricky given the weight of the pots.
Plant selection
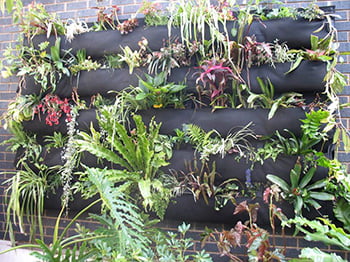
When it comes to plant selection, you need to choose plants that can cope with the conditions. They’re in small pots, so those with an extensive root system won’t work well, and they need to be able to cope with the amount (or lack) of sun. Jenny says she aims for “spillers, fillers and thrillers: spillers hang down, fillers fill out the space, and thrillers provide flowers or different leaf colours or shape.”
Jenny has tried strappy plants such as mondo grass, bromeliads, liriope and small dianellas and found they make good fillers. Many common houseplants such as syngonium, maranta, philodendron ‘Xanadu’, and a small crow’s nest and other ferns also grow well lower down. Fuchsia, clivea, alstroemeria, nandina and begonia provide flowers and leaf colour.
They also grow herbs, such as rosemary, sage, thyme, chives and parsley (which do well in the hotter conditions up the top), and mint (which does well in the shadier, cooler spots at the bottom). They grow some native plants too: groundcovers such as correa, native geraniums, scaevolas and brachyscomes.
It’s great to see these wall gardens doing so well. Vertical gardens can be a boon for those with small spaces that might otherwise be heat traps. Done right, they have the potential to add both aesthetics and cooling to our higher density cities, not to mention bringing in insects, bees, lizards and birds for biodiversity and plant pollination.
$40 for a single pocket; $1000 for a wall of 25 pockets; plus potting mixes, irrigation and plants (and installation if not DIY).
- Some ideas: www.greencities.net.au/gallery
- Carbon-positive house with sliding edible garden walls: www.bit.ly/CPHWVG
- Woolly Pocket and other vertical garden products: www.sowwhat.com.au
- Woolly Pockets: www.gardenbeet.com.au
- Various wall hangers: www.brickgrip.com.au
Going to Reo: another vertical garden approach
ATA members Sharon McGann and Paul Worth describe their pot-based vertical garden.

We saw a vertical garden we liked at a café in Melbourne, which inspired our version made by a local steel fabricator. Since then a local product Reogro has featured on The Block, and there are a number of providers; see www.reogro.com.au.
Building the wall
We tossed up between the rusty look, using untreated steel reo, or the painted look. We chose the coated version as we live near the sea. The build was fairly simple—two sheets of reo held apart with metal rods welded to the sheets. The fabricator then had the entire wall hot dip galvanised to prevent corrosion and sprayed with black enamel. It cost us $680 all up.
Filling the wall with plants
We found some standard 16 cm diameter terracotta pots for $2, so we purchased 30 of them. Friends told us we would get better water retention if we painted them, but we haven’t done that yet.
We started in spring with a ‘herb party’. We received quite a mix of herb seedlings, vegies, some flowers and succulents. The wall is west facing and gets the full Sydney summer sun all afternoon, so we needed hardy things.
We went to a course with a Sydney woman, Toni Slater: The Veggie Lady. She gave us great advice about setting up pots with organic potting mix and fertiliser brands.
We do a fair bit of travelling so after a month we hooked up a watering system. It’s on a timer to water at 6 am and 6 pm.
The lessons
Adjusting the drips is an ongoing effort. We are learning which plants need more water and putting them at the bottom so they get more water—the excess flows down. Choosing herbs and flowers that love full sun and like living in pots is another thing we’re learning.
The verdict
We’ve had it now for a year and we love it as a decorative and alive privacy screen. We enjoy seeing the plants through our back door. And we love walking out the door and cutting a few herbs to sprinkle on eggs in the morning or salads in the evening.
This article was first published in Issue 138 (Jan-Mar 2017) of Renew magazine. Issue 138 has building materials as its focus.
 ReNew
ReNew
A simple energy saver
One common cause of wasted electricity is when devices are left on unnecessarily, but there is a simple way to avoid that, writes Lance Turner.
Read more ReNew
ReNew
Simple and cheap composting loo
A composting loo lets you save huge amounts of water each year from toilet flushing, and can extend the life of an old septic by removing most of the solid waste load. Spud Murphy describes a popular design used for decades.
Read more