

DIYs for efficiency: Garage insulation and shutters
Kim Wilkinson describes his projects to reduce heat ingress into the house by improving the performance of the common wall between garage and house, and adding shutters to some windows.
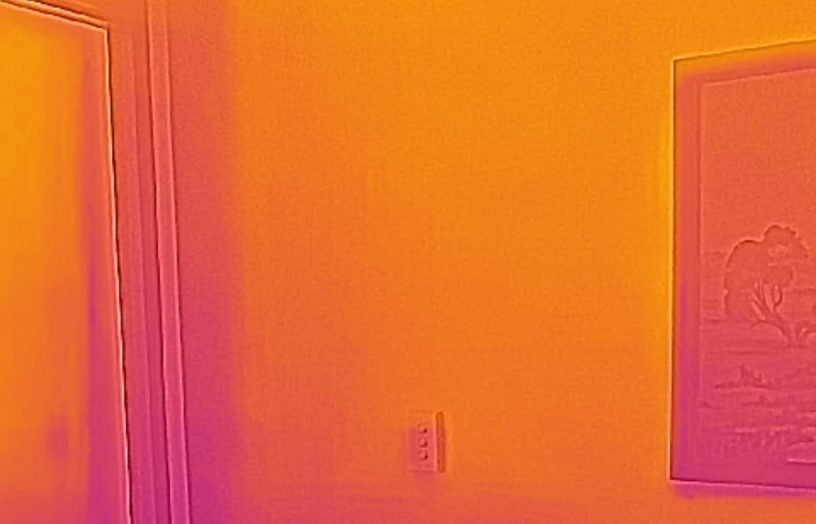
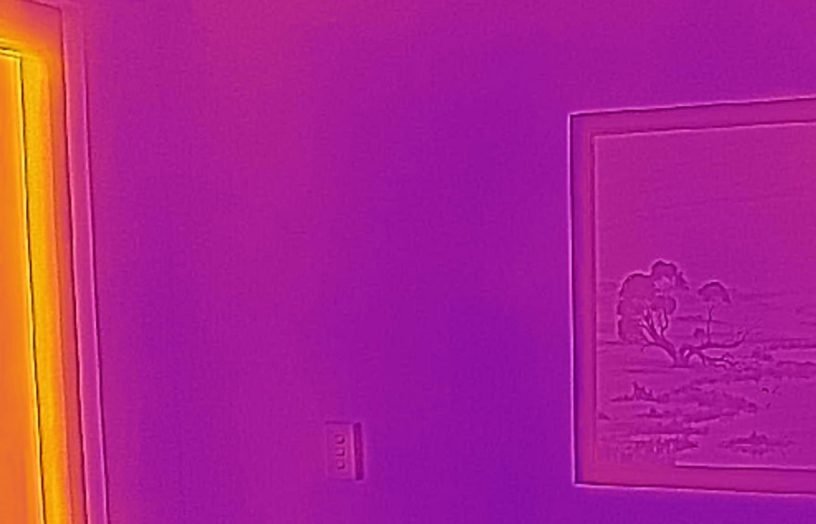
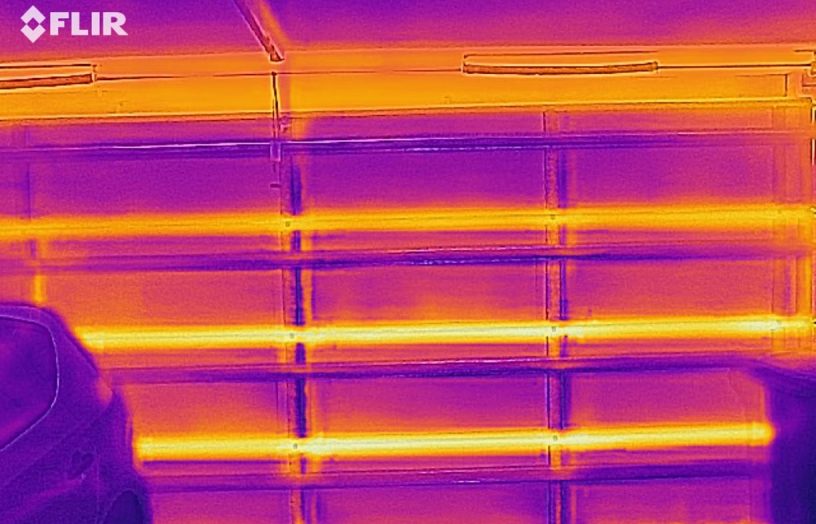
I have a very typical house (for Perth) with a single brick wall separating the house and garage. After getting a thermal imaging device last Christmas, I decided to check out various parts of the house and discovered a significant amount of heat coming through the common wall. I found that more heat was coming in at the front of the house than in the middle, with a hot spot where the solar inverter is located in the garage.
I found that the garage was getting very hot in summer—over 30 °C was common—as there is a steel panel roll-up door facing east. This heat was gradually making its way through the single brick wall which separated it from the entry and living space. I found out that the manufacturer now supplies insulated roller doors, but is not able to assist with retrofitting, so I tried a number of steps to ‘tame’ the garage.
Painting the external face of the roll-up door with insulating paint reduced the temperature between the outside and inside of the door by 10 °C.
Installing XPS (extruded polystyrene) board (rated at R1) into the back of the door was the next step. This involved removing the four horizontal bars (one at a time) and carefully measuring each gap so that the board would be a tight fit. I even tried putting a few other materials (like cork) into the space, but this did not make a significant difference, so I used the XPS board for the vast majority of the door.
I placed some spare XPS at the top of the door (inside) to stop the hot air on the outside of the door coming in, which also produced a major improvement in heat reduction.
After insulating the garage door as well as I could, it was time to tackle the common wall.
Insulating the wall
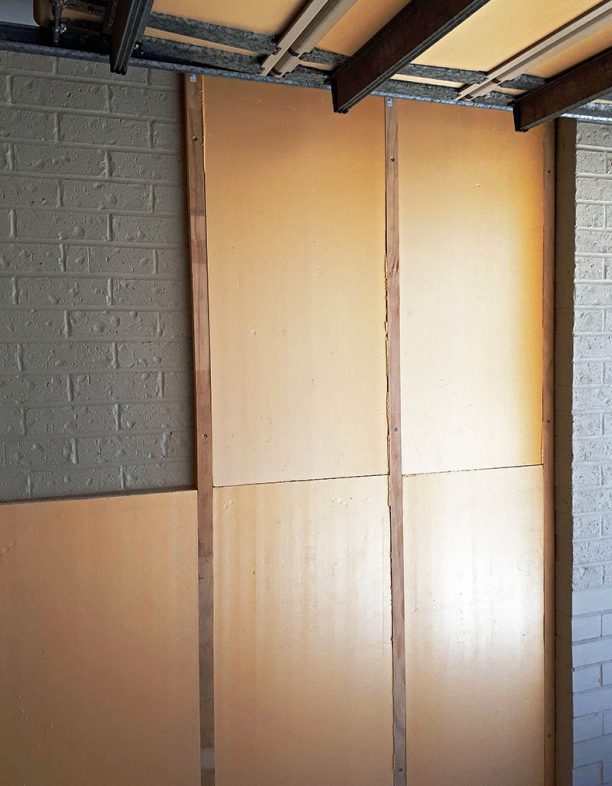
Based on some advice from Renew’s Lance Turner, I decided to convert the single-leaf common wall between the house and garage into a reverse-brick veneer wall. To minimise the increase in thickness of the wall, I selected a polystyrene board which is 30 mm thick and has an R-value of 1.
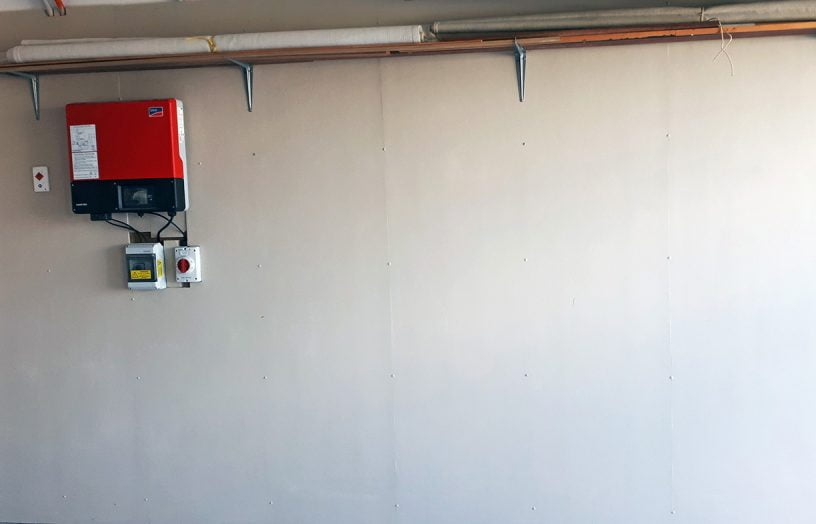
Construction started with putting up 50 mm x 30 mm dressed treated pine studs at 600 mm centres and trimming the boards to fit tightly between the studs. As it was not possible to completely remove the solar inverter, I put some 7 mm thick cork behind as much of it as possible.
I then attached sheets of 7 mm thick fibre-cement board to the timbers to cover up everything, and painted the board.
Thermal images before and after revealed a significant reduction in temperature and a far more uniform temperature along the length of the common wall. The wall started out with an R-value of around 0.19. After the reverse-brick veneer retrofit, the R-value is now around 1.21—a huge improvement. There has been a significance improvement in internal temperatures, both in summer and winter.
The project was relatively low cost: the timber, polystyrene and fibre-cement sheets cost about $600 total. The project itself was fairly simple, but I confess that I had a tradie friend help out.
I would recommend this project to anyone who has a single-leaf or uninsulated common wall between their garage and house, especially if the garage sees extreme temperature swings.
Installing some shutters
Our house has two small bedrooms on the south side, which, in our location in Perth, get the benefit of sea breezes and the impact of cold winds and rain in winter. However, they also get late afternoon sun in summer, which in Perth comes from the west-south-west and can be some of the hottest of the day.
I wanted to make the rooms a bit more comfortable by installing simple shutters on the outside to exclude this summer sun and keep heat in during winter. As I couldn’t find a commercially made solid shutter, I decided to make them myself.
My first attempt had some problems. I used light plywood that only lasted one winter before warping, plus the galvanised hinges rusted. I’d attached magnetic catches onto a cross bar and the shutters to keep them closed at the top, but this wasn’t strong enough to hold.

With my second attempt, on advice from a carpenter, I used a 9-ply marine-grade plywood (cut to size at the hardware store) and stainless steel hinges. The shutters now lock together when closed using a cabin hook.
I finished them with a couple of coats of paint and then simply screwed them to the brick wall. They have now been in place for several years and seem to be holding up well.
I made the two shutters for each window different sizes, based on the space between the windows—this was to allow the shutters to lay flat against the wall when open. I also overlapped the shutters when closed to provide a slightly tighter fit. This makes it easier to seal them than if the shutters butt together. Total cost for this project, for plywood, hinges and catches, was about $100.
Safety note
If you are working around an inverter or other electrical equipment, be careful that you don’t damage any wiring with screws, nails or staples, as there is a risk of electric shock if you penetrate a conductor with a metal object.
A simple, effective tip
In winter, Kim removes the fly screens from the windows and sliding doors on the north side of the house, as he found this significantly increases the amount of solar heat coming in.
More DIY articles
 ReNew
ReNew
Quick solar lighting
When I needed a light inside our new garden shed, a ready-made mini solar lighting system made it easy, explains Lance Turner.
Read more ReNew
ReNew
The cheapest way to save on electricity
Jack Gilding outlines his hot water system timer that reduces his water heating bills.
Read more ReNew
ReNew
A simple energy saver
One common cause of wasted electricity is when devices are left on unnecessarily, but there is a simple way to avoid that, writes Lance Turner.
Read more