

Digging the No Dig
Growing vegies with increasing summer heat and less rain doesn’t need to be a battle, writes Carmel Killin. A solution can be found in the water-retaining and humus-rich layers of a No Dig bed.
When it comes to growing edibles in the backyard or on the balcony, our main concern in these days of climate challenges is often around water-wise gardening techniques: how to combat the increasing summer heat and the lack of rain. It doesn’t need to be a battle though. No Dig gardens are sometimes referred to as lazy gardening because once you’ve created one there’s really not much maintenance required for them to thrive. And that includes watering.
Adopted by the permaculture movement in the 70s, the No Dig garden concept comes from a natural farming technique developed in Japan in the late 1930s through the pioneering research of Massabou Fukuaka. Rather than tilling the ground the conventional way, the growing space is created by building up layers of organic materials in a manner that mimics nature itself. Think of it as nature’s giant vegie lasagne.
The key ingredients for this lasagne garden bed are compost, manure and carbon matter, like lucerne or pea straw, plus plenty of watering between each layer. The idea is to build high and let it decompose naturally to create a rich, moist humus, the optimal growing medium. Watering well for each layer in the initial construction of the bed is crucial to its effectiveness and ability to hold water over time.
There are many things to love about this form of garden bed. It’s quick and easy to build, it improves the soil over time, it saves water, it allows worms and roots to do the work of aerating the soil and it eliminates the need for herbicides. If you have a home composting system or backyard chickens, you can use the organic waste from these as your compost and manure layers and thus save money.
The No Dig is great for a ground plot or raised garden beds, but is adaptable to virtually any situation, including building one directly over a concrete slab. The outstanding feature of this natural layering technique is the quality of the soil that it creates—friable, sweet-smelling, nutrient-dense humus that means a farewell to the frequent waterings normally required over a string of hot, rainless days in summer.
The downsides? If you’re not making your own compost and don’t have access to chicken poo, the initial costs of setting up a No Dig bed can be a bit steep. However, if you’re after a no-fuss, water-efficient garden, then this beats all the other smart gardening concepts, including the wicking bed.
You’ll find many different recipes for a No Dig garden. The only one I’ve ever used was taught to me by Melbourne gardening guru Justin Calverley who is a passionate advocate for these types of gardens. (You’ll find his recipe below.)
According to Justin, how much you need to water one over summer depends on the recipe, orientation and species of plant. “I have found that with my recipe, tomatoes that have a north-facing orientation only need one watering per month after planting,” he says. Your tomato plants may look a little straggly towards the end of the season but it’s the minimal water that intensifies the flavour, and who doesn’t want that?
My final tip for success is to keep your bed shaded from the western sun, it can be a real killer in a Melbourne summer. I hope you enjoy experimenting with this very rewarding layering technique that is the No Dig garden.
Ingredients for a plot 2 m long x 1 m wide x 0.5 m high
- Suppression layer on soil: one large cardboard box/old cotton bed sheets/20 newspapers
- Aeration layer in pots or on concrete: bunch of sticks, branches
- 2 x bales of pea straw/ lucerne
- 0.25 m3 compost (or 10 x 25 litre bags; get bulk if you can to avoid the plastic bags)
- 2 x 25 litre bags of manure, chicken preferred
- Water.
Method
- Find a good spot for your No Dig garden. A north-east perspective with five to six hours of direct sunlight is ideal.
- For a concrete slab or in terracotta pots, you need to create aeration at the base, so start with a layer of sticks.
- If you’re building directly over grass or poor soil, start your base layer with organic materials like paper or cotton to suppress weeds. Water thoroughly.
- The next layer is pea straw biscuits. These are the tight layers that you can pull apart from a pea straw bale. Layer to the required depth. Water thoroughly.
- Continue the layers following the recipe below, always soaking well with water after each layer.
- Finish with loose pea straw. Plant your seeds or seedlings through the mulch, and water in, followed by liquid seaweed.
- By harvest time, your layers will have reduced down to half the original height. To prepare for the next season you only have to add the growing layers—fertiliser/ compost/ fertiliser/ loose pea straw.
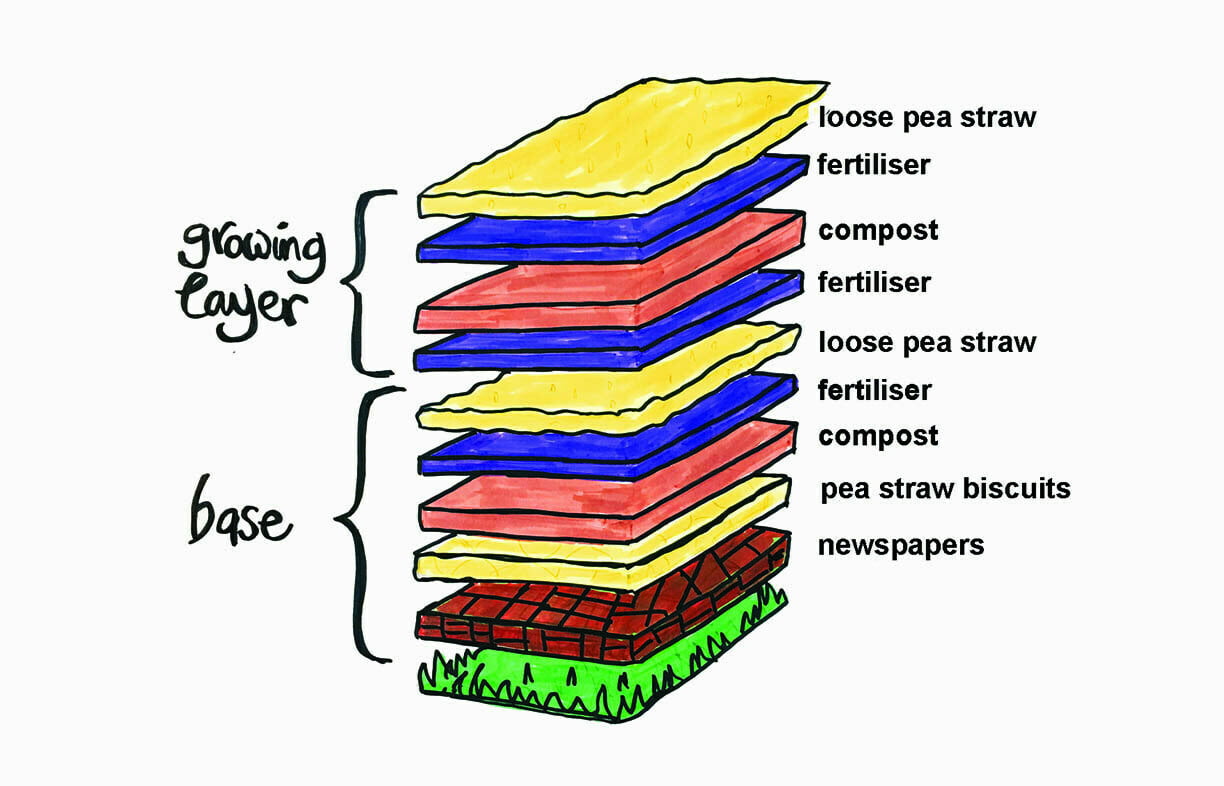
The layers recipe
NB. Start layering from the bottom of each list
For concrete or pots
GROWING LAYER
- 9. Loose pea straw 7.5 cm
- 8. Fertiliser 2.5 cm
- 7. Compost 10 cm
- 6. Fertiliser 2.5 cm
BASE LAYER
- 5. Loose pea straw 7.5 cm
- 4. Fertiliser 2.5 cm
- 3. Compost 10 cm
- 2. Pea straw biscuits 10 cm
- 1. Twigs 7.5 cm
On soil or in raised garden beds
GROWING LAYER
- 9. Loose pea straw 7.5 cm
- 8. Fertiliser 2.5 cm
- 7. Compost 10 cm
- 6. Fertiliser 2.5 cm
BASE (SUPPRESSION) LAYER
- 5. Loose pea straw 7.5 cm
- 4. Fertiliser 2.5 cm
- 3. Compost 10 cm
- 2. Pea straw biscuits 10 cm
- 1. Newspapers/cardboard/cotton sheets 10 cm
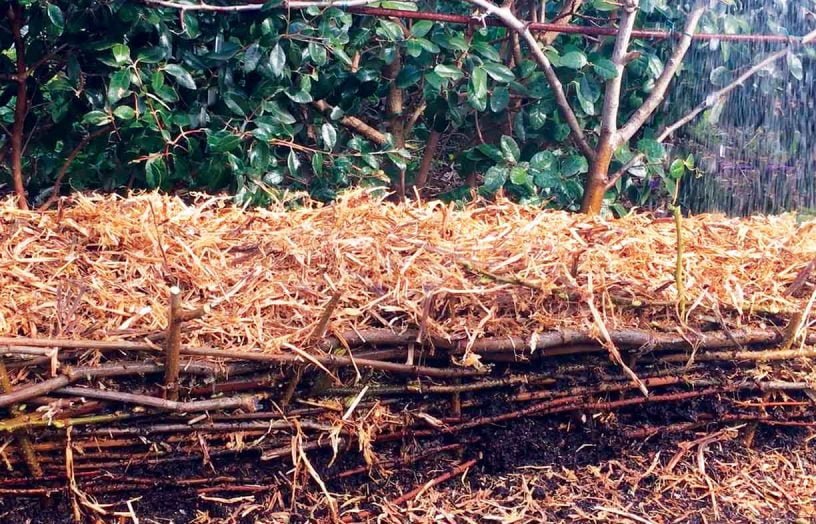
Case study: No Dig at Ceres in 2017
In Spring 2017 a group of us created our first No Dig garden out the back of the restaurant at Ceres. Our small plot had all-day sun and hugged a large expanse of bitumen, not ideal conditions for a Melbourne summer.
Because we were building straight onto a bare garden bed, we didn’t bother with a suppression layer (usually required if you’re building over grass, weeds or really poor quality soil). We started with a bale of pea straw, pulling it apart in chunks, known as biscuits, and layered and overlapped them onto the soil to the required depth. Then watered, and watered again. And watered some more.
Thorough watering between layers is the key to success with this type of garden. Water speeds up the decomposition process required to produce that magical humus.
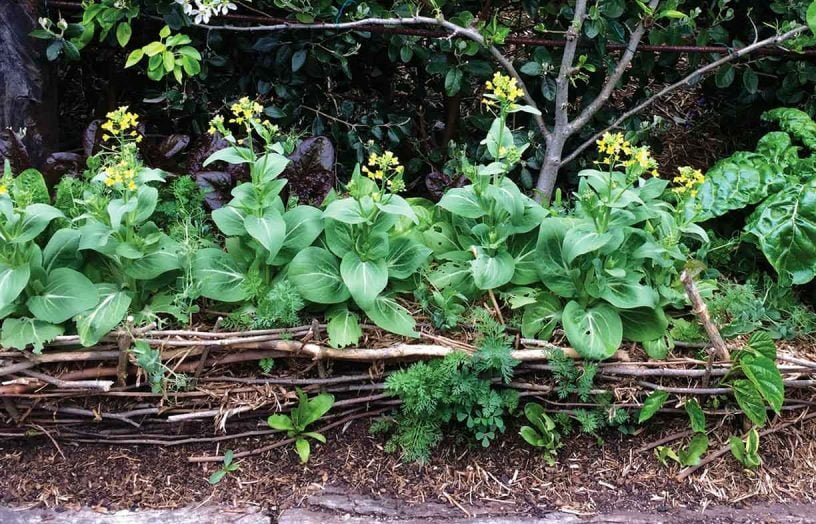
We constructed a small retaining wall of woven twigs and branches to keep our bed from collapsing onto the bitumen. We planted seedlings of silverbeet, bok choy, kale, carrots and some herbs. We did a final watering mixed with some Sea Sol and then we left our garden for six weeks.
In that time there had only been one day of very light rain. And once, somebody gave it a watering. That was all. When we returned to our garden in mid-spring we had lush produce to harvest, with some vegies that had gone to seed and others well on their way to producing a robust summer crop.
Related articles
 ReNew
ReNew
Quick solar lighting
When I needed a light inside our new garden shed, a ready-made mini solar lighting system made it easy, explains Lance Turner.
Read more ReNew
ReNew
The cheapest way to save on electricity
Jack Gilding outlines his hot water system timer that reduces his water heating bills.
Read more farming
Balancing nature’s books
Lyndall Thomas shares how accountants could help save our natural ecosystems one dataset at a time.
Read more