Sealed with a SIP
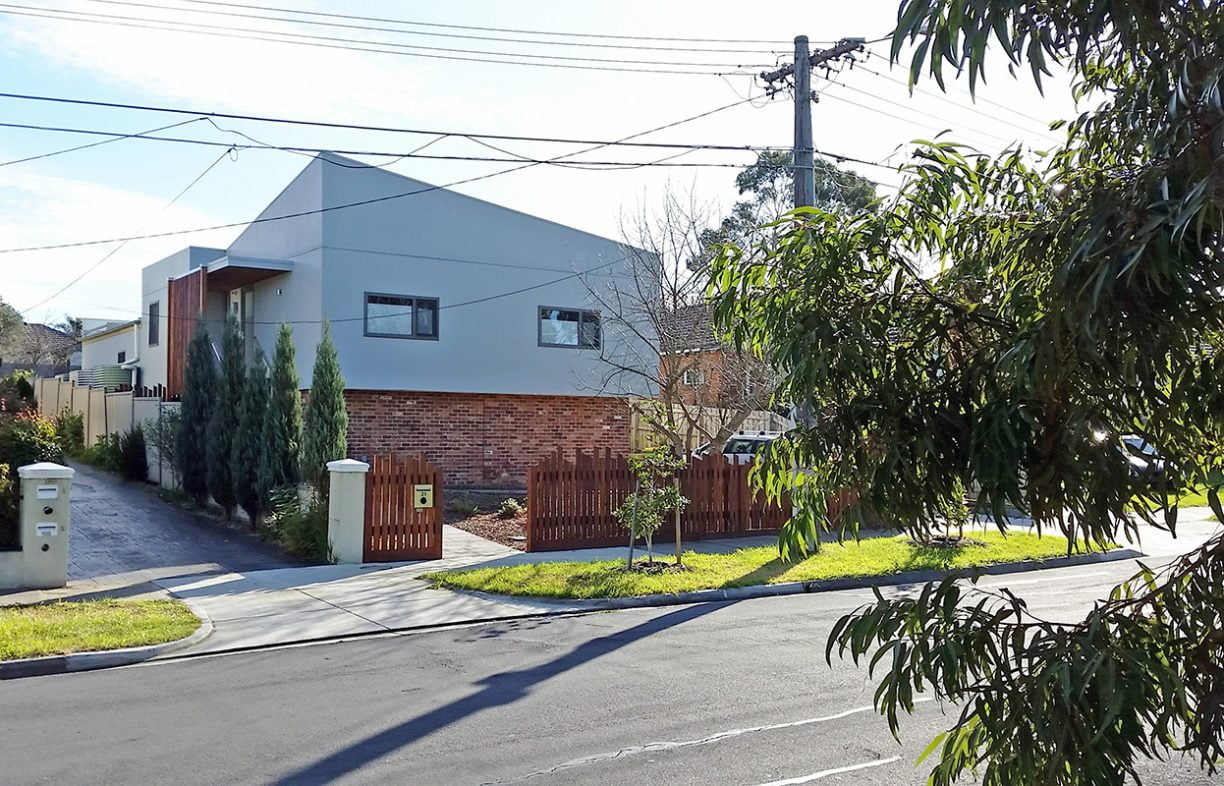
The energy costs for this four-person household were $560 for the year (basically just the daily charge), due to an airtight house design, a PV system well-matched to usage and a switch to all-electric. Kyle O’Farrell describes how they got there.
In December 2012 we were living in a small double-brick ex-Housing Commission home in the northern suburbs of Melbourne. With two growing kids sharing a bedroom and a very non-user-friendly layout, we knew it wasn’t going to work in the longer term. However, we liked where we were living and didn’t want to move. The house was built in 1953 and, aside from some minor wall cracking, it was basically sound and could probably be used as a base for a renovation. So what to do?
We asked architect Mark Sanders at Third Ecology to create three concept house designs for us: two incorporating the existing house and one a completely new build. To our surprise, the estimated cost for the new build was only around 10% more than the renovations. And, with the existing house set well back on the block, the most logical renovation design would mean building in our north-facing backyard with a significant loss of garden space, not something we were keen to do.
Thus we decided on a new build, given the benefits in orientation, block placement, reduction in project time and cost risk (renovations often throw up costly issues along the way), design layout and improved thermal performance.
The previous house was connected to the gas network, but we disconnected it during demolition and we wanted it to stay that way: for environmental, health and financial reasons, not least of which is that gas is a fossil fuel which contributes to climate change. We were also planning to install solar PV and wanted to maximise on-site usage of electricity, rather than pay the expense of a gas connection, gas plumbing and increasing gas prices. Finally, we were planning to build a very well-sealed house, so we felt that piping an asphyxiating and explosive gas into it was worth avoiding if possible. We also didn’t want the combustion products (mainly CO2 and water vapour, but also nitrogen oxides and carbon monoxide) in the house.
Around the same time, Beyond Zero Emissions released its Buildings Plan, which strongly supported going gas-free and outlined how to do it. Nice report.
Design for thermal performance
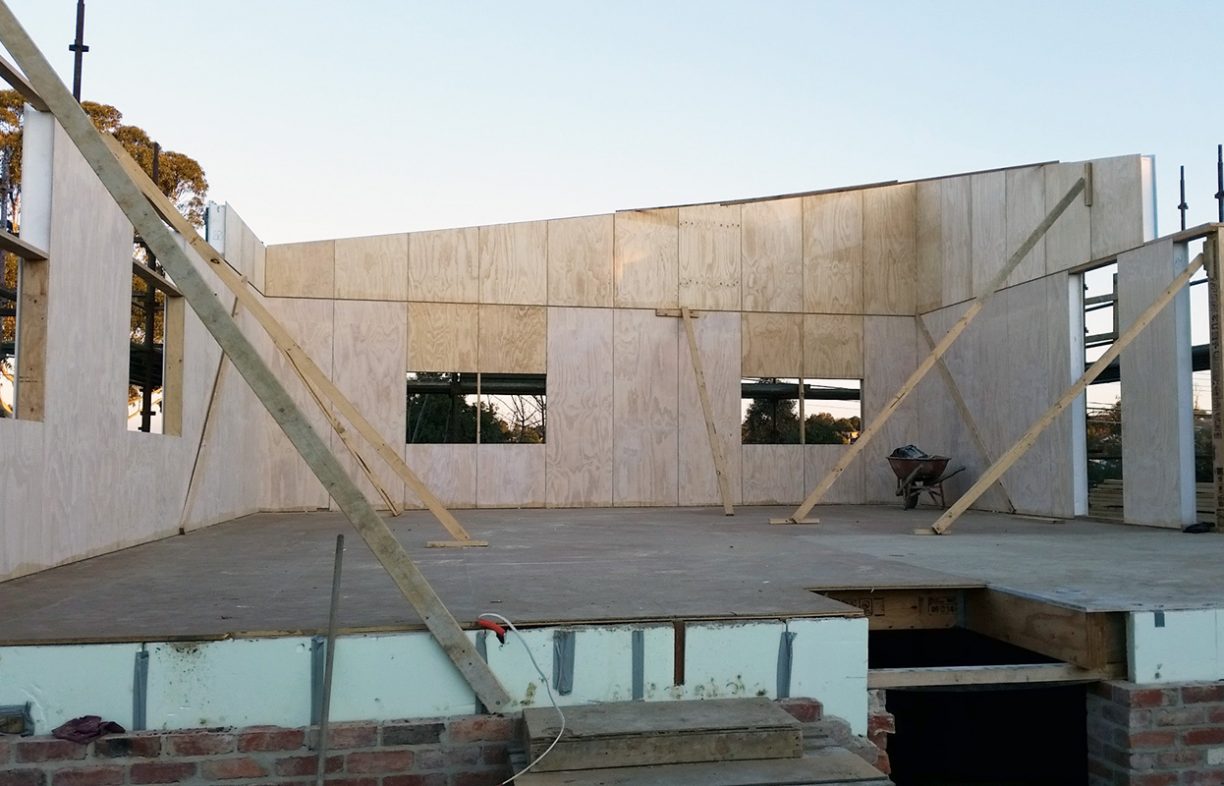
When it came to the house design, we liked the features of the Passive House approach to house construction, but knew there was a higher cost associated with the additional design, construction and certification requirements. Looking around for construction methods that could achieve similar insulation and air sealing, without additional building costs, we found structural insulated panels (SIPs). These are wall panels with a foam core and rigid panels glued to each side. The panels are weight bearing, so timber framework for the external walls is not required.
After researching SIP suppliers (we identified four at the time) we decided to use Habitech Systems, which provides SIP-centric architectural design and also supplies the SIPs. Habitech was very transparent about the SIP costing which allayed our concerns about locking into a SIP supplier without being able to compare quotes.
By the end of August 2014 we had a 150 m2 house design by Habitech and had engaged Henry Netherway to build it, with a contract build cost around 5% less than the estimate by Third Ecology: so we don’t think we paid a price premium by choosing SIPs.
The house design also incorporated around 9000 of the 11,000 bricks we had recovered from the demolition of the old house (which probably contained about 14,000 bricks) and a proportion of the recovered structural timber (mostly messmate we believe).
During the design process Chris Barnett at Habitech Systems suggested getting Chris Jensen from Green Sphere Consulting involved to do thermal modelling. This included the required compliance modelling as well as additional modelling Habitech suggested on optimising window sizes and shading, and modelling we wanted done to estimate the heating and cooling requirements. Chris Jensen used the IES Virtual Environment software package, which can answer these kinds of detailed questions. Based on the plans, the house design scored 8.1 Stars on the NatHERS House Energy Rating Scale.
The heating and cooling demand report was important to us, to show whether we would be able to heat and cool the house with two reverse-cycle air conditioners and if our preferred placement would provide reasonable heat distribution throughout the house.
It showed that, for almost all conditions throughout the year, a total of 2.8 kW of heating capacity and around the same of cooling would be sufficient to maintain a comfortable internal temperature. Extending that to all conditions, 4.5 kW of heating would work.
This was good news! It allowed us to proceed with confidence, committing to installing two small high-efficiency (COP 5.2) reverse-cycle air conditioners as our only active heating and cooling, with a total of 6.4 kW of heating output and 5 kW of cooling.
We also decided to install 7.6 kW of solar PV panels with a 6 kW inverter. The array was a little oversized as it is split into two separate arrays, facing different directions. It was also sized to provide extra output during winter. Increasing the inverter size to match the array wasn’t possible as a 6 kW inverter was the largest available at the time.
We estimated that we would use around 17 kWh per day during winter, on average, and this system was sized to provide that.
Sealed with a SIP
A key aspect of the build was ensuring that any gaps between the SIPs (used for both walls and roof) around windows and external doors and any penetrations through the external walls were well sealed. As we had hoped, the SIPs were relatively straightforward to seal against air movements. The builder was highly cooperative, with one of the younger builders spending around two to three days (or more) wandering around with a caulking gun. The builder also knew that we were planning a blower door test a month or two after the lockup stage was completed, which helped focus their attention!
The blower door test was undertaken by Jan Brandjes at Air Barrier Technologies and cost $500. The result showed an air leakage rate of 1.15 air changes per hour at a 50 pascal (ACH50) air pressure differential between the inside and outside of the house. This is much lower than the typical range of 10 to 28 ACH50 for 5 Star homes (as tested by Air Barrier Technologies). Following the test we were also provided with a list of gaps to seal to improve the performance further, which we have done. We haven’t retested the house since the followup sealing work, but presumably the air leakage is reduced, and possibly getting near the Passive House air leakage requirement of 0.60 ACH50.
The wall SIPs have an R value of 4.3 and the roof SIPs are R5.3. The house is half on a raised timber floor that has R3.2 spray foam insulation underneath; the other half has an on-ground concrete slab, with underslab and perimeter insulation.
Conditioned for comfort
As outlined before, we had confidence that our heating and cooling requirements would be met by a couple of small reverse-cycle air conditioners, one at the front of the house and one at the rear, and this has proven to be the case. A nice feature of a well-insulated and sealed house is that the internal temperature is even and comfortable throughout the house and, in winter, the absence of heat sources in rooms isn’t noticeable at all.
In June 2016, Habitech Systems commissioned Bruce Rowse from 8020Green to undertake temperature and humidity monitoring around the house to see how it was performing. Bruce found that the average winter temperature inside our house was 18.6 °C, which compares well with typical Melbourne homes of 5 Stars which have an average winter time temperature of 17.9 °C. Figure 1 shows the results for one week in June, with outside temperatures ranging from 1 °C to 17 °C while inside was much more even and comfortable, ranging from 17 °C to 21 °C.
The indoor temperature stays quite stable, with only limited use required of the reverse-cycle air conditioners. We have found that on cold but clear days with plenty of sun, little or no additional heating is required; what comes in the windows is enough to heat the house.
During last winter (June–August 2016) we used a total of 620 kWh for heating (an average of 6.7 kWh/day) and during summer (December 2016–February 2017) we used 295 kWh for cooling (average of 3.2 kWh/day).
Relative humidity was also monitored in the lounge room over June 2016. It varied between 49% and 76% which Bruce said was an acceptable range in a Melbourne winter [Ed note: the specified range for human comfort at normal room temperatures is 30–60%.]
Ventilation
With such a well-sealed home, an active ventilation system is essential. In fact, Jan at Air Barrier Technologies said that our house was sealed to twice the level that triggers the requirement to install a ventilation system in Canada, where such regulations exist. For ventilation we installed an Atlantic Duolix Max heat recovery ventilator (HRV).
We selected the Atlantic unit based on price and features, and because we could install it ourselves. The HRV heats the outside air by running it through the heat exchanger, counter current to the exhausted air. For example, during winter the inside air temperature might be 20 °C, with an outside air temperature of 10 °C. The incoming fresh air is heated using the exhausted air and delivered into the house at around 18 °C, significantly reducing the heating load.
The HRV brings in fresh air at a controlled rate (we have our unit set at around 100 m3/h) and filters it. The unit comes standard with F7 filters which remove particles down to two microns, which includes pollens and most mould spores. It also exhausts excess humidity from the house and connects the kitchen rangehood to the outside. Finally, it circulates the warm or cool air from the air conditioners around the house, if they are running.
The HRV unit was fairly expensive even though we installed it and the ducting system ourselves to cut costs; however, we understand that the cost of these is falling, with cheaper Chinese models now available.
The kitchen rangehood discharges directly into the kitchen, very close to where a return air vent to the HRV is located. This approach was suggested by Air Barrier Technologies and has worked well, as it provides a clear path to extract water vapour from the kitchen to outside while cooking. The setup also avoids the need to put another hole in the house or install the kitchen range in a recirculating configuration with carbon filters, which require regular changeover along with the additional expense.
Hot water choice
One aspect we were unsure about was whether to install a solar thermal hot water system, boosted by either a heat pump or instantaneous gas (necessitating a gas connection) versus installing just the hot water heat pump. We looked at quotes for both a solar thermal system (with gas boosting) and for a hot water heat pump and worked out that over ten years the solar thermal hot water system would cost more (including purchase, installation and running costs).
There are other advantages of a heat pump, including reduced system complexity: a whole system is eliminated from the roof, along with the required plumbing, wiring and mounting system. This leaves more room for solar PV and excess electricity can be exported to the grid, but excess energy generated by solar thermal systems is lost. And, in a solar thermal system, if a fault arises, it is often missed as the booster kicks in and no one notices. With a heat pump, the hot water tank also effectively becomes an on-site battery storing perhaps 2 kWh to 4 kWh of PV electricity most days, depending on household usage. Of course, this energy is only accessible as hot water.
So going with the hot water heat pump was an easy decision in the end.
Cooking with induction
As outlined previously, we didn’t want to be burning gas inside our well-sealed house, even though it is well ventilated. In addition, induction cooktops were getting strong reviews (e.g. in Choice), so we were happy to go with an induction cooktop and replace a few pots that didn’t have a ferromagnetic base. Ovens are mostly electric now, and our preferred oven was electric, so we had no gas/electric decision to make there.
We modelled that a gas cooktop is under certain tariffs cheaper to run than an induction, but far more expensive to install in our situation. This is because we would have been taking on all the costs of connecting to gas, plumbing it through the house and paying a daily connection charge, just for the gas cooktop. The induction cooktop was around $2200 at the time, plus a bit more to run a 32 amp circuit to the kitchen; the gas cooktop total costs would probably have been around $3000, plus another $300 a year for the connection charge.
The other issue with gas cooking is its impact on indoor air quality and humidity. A gas cooktop burner on a medium setting consumes around 5 MJ/h, which when combusted results in the emission of around 260 grams of CO2 and 210 grams of H2O. For a house of our internal volume (~500 m3), 260 grams of CO2 would raise the internal CO2 concentration from around 400–500 parts per million (ppm) by around 300 ppm per hour. So the use of even one gas burner can have a reasonable impact on indoor air composition; however, you would probably need to raise the CO2 concentration to around 2000 ppm before you might notice any effects, such as drowsiness. This wouldn’t be an issue as the house is well ventilated, but we felt it was worth avoiding in any case.
This combustion is also enough to raise the indoor humidity level by around 5% per hour if distributed evenly, which is not a great deal, but again is still not desirable.
Our experience with induction is that its performance is notably superior to gas cooking in terms of responsiveness, heating time, heating level control, other control functions and ease of cleaning.
The energy balance
In April 2015 we installed four submeters to enable us to monitor electricity use of various parts of the house and our PV generation.
The house is well and truly energy-positive. Across the 12 months of 2016 our PV system generated 9890 kWh, with household consumption of 6160 kWh (16.9 kWh/day) and net export of 3728 kWh. This comes out to about half the energy we used in our old house, for a new house that is much more comfortable, larger (150 m2 compared to 100 m2) and exports much more energy. (In our old house, energy use over three years averaged 34.6 kWh/day, based on gas use of 102 MJ/day—28.3 kWh—and electricity use of 6.3 kWh/day.)
We are using more electricity in winter than we anticipated, at about 21 kWh/day on average last year, probably something we could improve by managing the house more actively. The PV system generated 17.5 kWh/day during the same period.
Our total electricity cost was $560 in 2016, including the feed-in tariff payments for PV exports. Of this, around $420 was the daily service charge, with a net usage cost of $160.
Our total thermal energy load across the 12-month period was 1282 kWh (excluding running the HRV), which is 4620 MJ over the year. The internal floor area of the house is 150 m2, so the house is using around 31 MJ/m2.y (or 8.5 kWh/m2.y). This corresponds to a NatHERS energy rating in Melbourne of between 8.5 and 9.0 Stars, quite a bit better than the modelled rating of 8.1 Stars, and due in large part we believe to the extra attention given to sealing the structure. It is also well under the Passive House heating and cooling energy demand requirement of 15 kWh/m2.yr.
Our verdict
For us, from the perspective of cost, functionality, simplicity, environmental impact, future trends and safety, going all-electric seems to be ahead on all fronts.
Heating/cooling:
- 2 x Mitsubishi Heavy Industries SRC25ZMXA-S/SRK25ZMXA-S heat pumps, 2.5 kW cooling (EER 5.2)/3.1 kW heating (COP 5.26)
- Ceiling fans in most rooms: 3 x Mercator Grange 1300 mm with LEDs, 3 x Lucci Futura Eco 1200 mm with CFL (reinstalled from old house)
- Atlantic Duolix Max heat recovery ventilator, reclaims up to 91.5% of thermal energy from extracted air
Hot water:
- Sanden Eco heat pump (COP 4.5), 315 L tank
Cooking:
- Electrolux EHI935BA induction cooktop; EVEP613SA pyrolytic oven; EMC2867BI microwave/convection oven
Energy generation:
- 7.6 kW PV: 28 Yingli Panda 270 W panels in two strings with different solar orientations; ABB PVI-6000-TL-OUTD 6 kW inverter
House features:
- Design by Habitech Systems, build by Henry Netherway Pty Ltd
- SIP panels: roof Kingspan, 100 mm, R5.3; walls Habitech, 130 mm R4.3
- Concrete slab with under-slab and perimeter insulation
- Windows for Life uPVC tilt-and-turn windows, double-glazed, double-gasket seal, Deceuninck profiles
- Habitech custom-designed stainless steel fixed awnings on north-west/north-east windows
- Custom-made 4.5 m x 3.5 m retractable awning to north, from Kingspan SIPs
- Norfolk Blinds ‘Perfect Fit’ blockout cellular blinds, with air cell and double aluminium film layer.
This article was published in issue 140 of Renew magazine. Issue 140 is an All-Electric Home special.
RECENT ARTICLES
 All-electric
Mandatory disclosure of energy ratings on the horizon
Graham Hunt introduces us to a soon-to-be-implemented national framework that will be a massive win for renters and homebuyers.
Read more All-electric
A gas-to-all-electric and EV retrospective in data
Peter Hormann's household has invested in energy efficiency and converted from gas-electric to all-electric for their 1908 Edwardian home in Melbourne. So what can be learnt from the last 8 years through data? What might have happened otherwise?
Read more Efficient homes
Building for a changing climate
Are we building homes for the future, or for the past? Rob McLeod investigates how climate change is impacting home energy ratings and the way we build our homes.
Read more
